The basics for a home DIY video recording studio are pretty simple, although it may take a little bit of tweaking to get it right. Of course you get a long way taking advantage of natural light. However this is not always possible. During longer shoots, for example, the natural light from a window may change due to clouds passing by. Or it may simply be too dark outside.
So what if you want to create a setup that you can always use and gets you the same consistent result. Well, then you can create a home video studio.
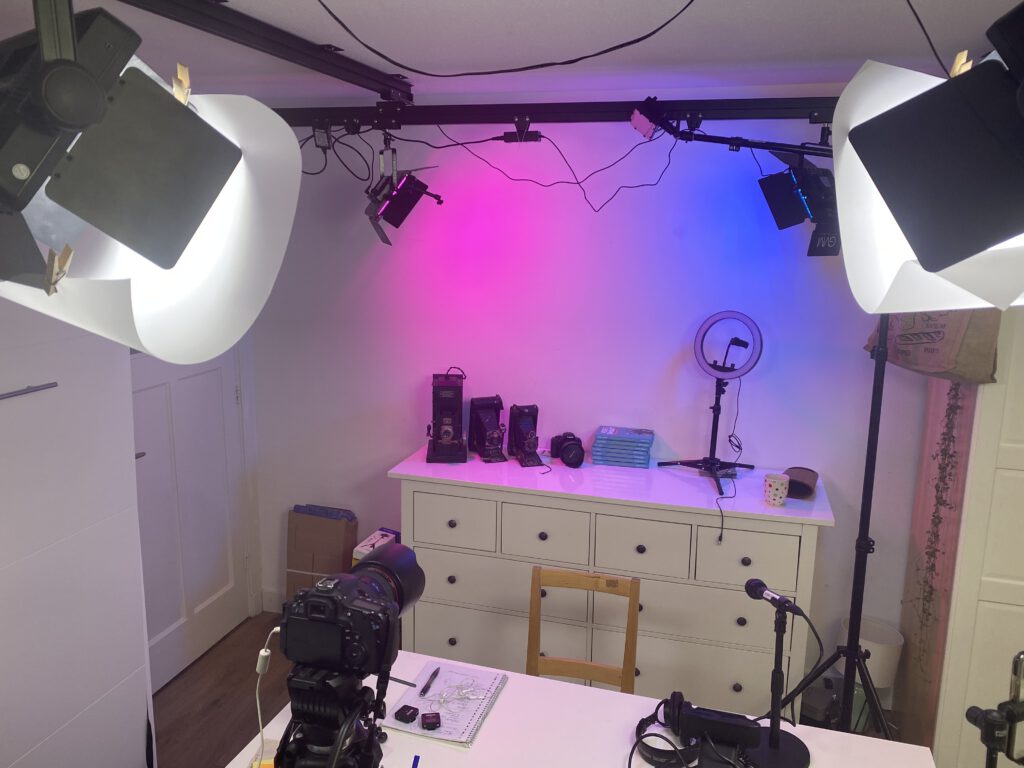
This picture shows our own home office, which also services as our home video studio. It is a work in process, which we are constantly improving and fine tuning.
The room itself
Let’s start with the type of room. There is good news: any type of room will do. You will need a backdrop that looks nice on camera. And you will need some distance between you, the camera and the lights. If you have 2 meters (6 feet), you have enough to work with.
Ideally the room isn’t too noisy. So maybe don’t pick the room adjacent to that noisy street (if you have that luxury). Finally, avoid bright colors on the walls as it will influence your lighting. Gray, white or anything in between will work best.
Basic video studio lighting
Next up is Lighting. You will need a Key Light and a Fill Light. These lights should have sufficient output for your size studio. Our LED panels, for example, have 500 leds and are rated at 2900 lux each, which are barely sufficient for our studio (we sometimes add an additional Key Light). So if you budget allows, it’s better to have too much light (which you can dim down) than not enough.
We recommend you to defuse the light either by using softboxes or using scrims or diffusion foils in front of the lights. Diffused light comes across more naturally and it is more forgiving as well (more flattering).
These lights should come from the right and left front, aiming a bit down on the subject. As the light outside comes from above as well this will give the most natural results. The output of the Key Light should be set higher than the fill light. We use two Godox LED panels, with diffusion foil clipped to the barn doors to diffuse the light. If the studio is larger than ours or you want to be able to shoot with more than one subject, we recommend lights with even more output.
Three point lighting
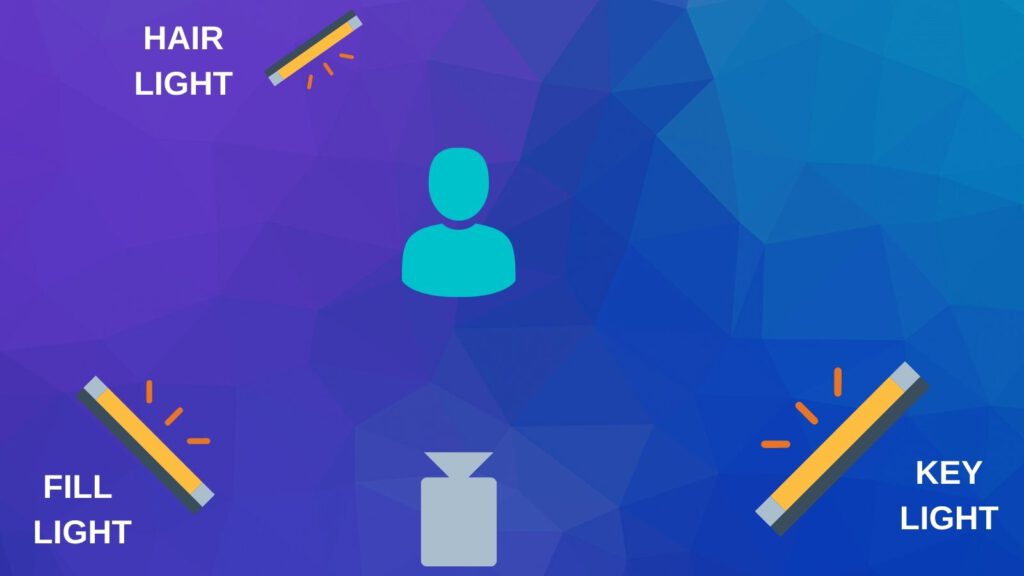
You can add a “hair light” (also known as “back light” or “rim light”) to slightly light the back of the hair, which will separate the subject from the background. This is the last light of the well known “three point lighting” setup.
Key light: The key light is your main light. It is typically positioned in front of your subject, slightly above and either to the right or left.
Fill light: a softer light which is used to fill in shadows on the face. It’s faced opposite from your key light. Use about half the output of your key light.
Hair/Back light: The hair light creates separation between your subject and the background, creating depth in your shot. It also provides a soft glow in the background. It is positioned above and slightly behind the subject.
Lighting the background
You can also add lights to light out the background. Although it is not essential, it can create a nice effect. For this you can use lower output lights. We use a set of three GVM lights for this (we actually use an even smaller LED panel as a hairlight, but the GVM light would do perfectly as well). These lights also can be set to different colors to create some nice lighting effects on the background.
Perfecting your setup
When you have lighting in place, you can then play with the distances between the lights and your subject. You can also change the light intensity and play around with the temperature of your hair light and background light. You can even go for a colored background.
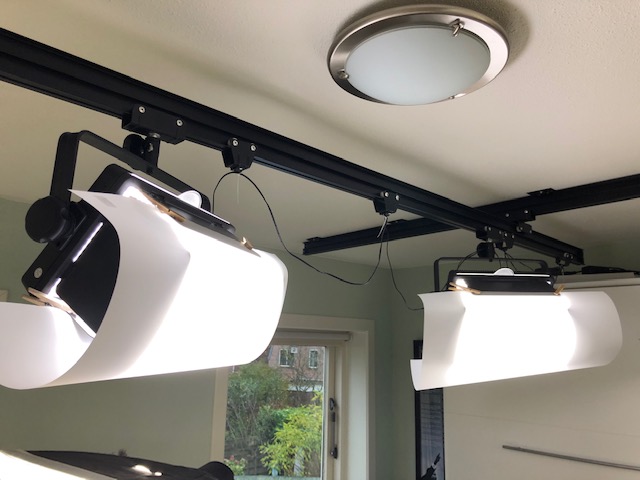
We recently upgraded using a rail system on the ceiling so we do not trip over wires and all the light stands, however of course this is an extra luxury that can be added over time. For the rails system we use you need to drill holes in the ceiling, however there are also solutions that prevent having to do this.
Position your smartphone or camera
Of course you need a tripod and camera. Make sure you position the camera so that you are framed in the best way. If you are tall, make sure to buy a tripod that reaches eye-level. And don’t forget to get the exposure and focus right on your smartphone or camera.
Capturing audio
Make sure you use a good mic. We prefer to use lapel/lavalier mics. It’s hardly noticeable on camera and it creates good consistent audio, even when moving around a bit.
To improve acoustics of the room you can hang curtains, add upholstered furniture and/or use some absorption panels in the room to prevent sound from bouncing around in the room. Hard surfaces, such as windows and walls reflect sound. If you clap your hand and listen for echo you can find the problem areas and make adjustments. You can also cover surfaces with blankets.
Home video studio equipment
There are plenty of options to choose from when it comes to investing in equipment for you studio. We chose to buy equipment that we can also use at a different location. We also repurposed our older equipment to safe cost. To give you an idea, we have made an overview of the most common tools we use in this overview. We recommend that you also do your own research and to start simple.
And there you have it. We have covered the key elements of creating your own DIY home video studio: the room, lighting, the background, camera position and last but not least audio. Please leave a comment with your suggestions or questions.
And don’t forget to check out Pelpina’s new book VIDEO SMART (ad) on amazon.
Now you’re ready to start shooting video!